This deck recently won me a 14 man tournament run at Bournemouth’s Bag of Holding store (http://www.bagofholding.co.uk/). High on my victory and having been asked for my decklist all of once, I thought I’d go over the top and do a full card by card breakdown.
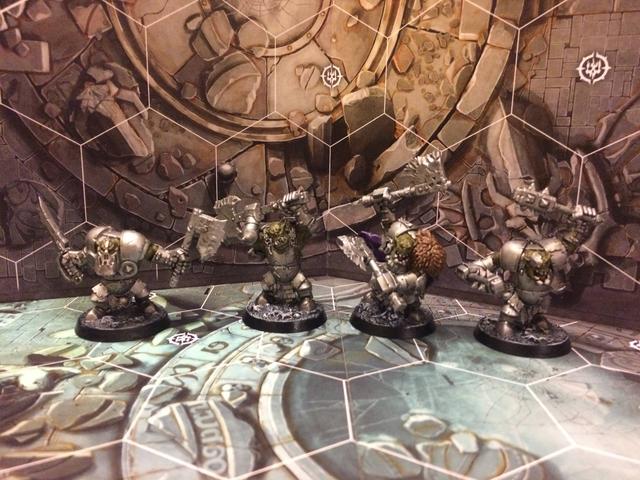
It’s a defensive, objective based Orruk deck which seemed to surprise most people, but they do very well at it. The general plan is to sit Basha and Hakka on the back line on a couple of objectives, and send Gurzag and Bonekutta out into enemy territory to take more objectives as necessary. Kills are only gone for in self defence when someone is up in your face and when the opportunity for a quick snipe glory point comes up.
Cards
89 Biggest an’ da Best
98 Brutal but Kunnin’
107 ‘Ard Head
115 Unkillable
254 Determined Defenders
255 Divide and Conquer
263 Hold Objective 1
264 Hold Objective 2
265 Hold Objective 3
266 Hold Objective 4
267 Hold Objective 5
281 Plant a Standard
292 Supremacy
296 Tactical Supremacy 1-2
297 Tactical Supremacy 3-4
311 Confusion
315 Daylight Robbery
318 Distraction
320 Duel of Wits
330 Healing Potion
359 Shifting Shards
360 Sidestep
363 Sprint
371 Trust to Luck
380 Cunning Duellist
389 Great Fortitude
390 Great Speed
402 Legendary Swiftness
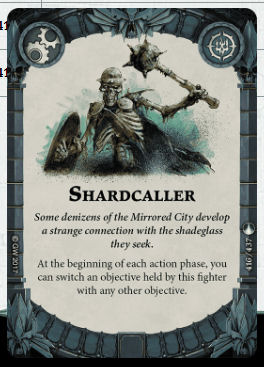
416 Shardcaller
420 Soultrap
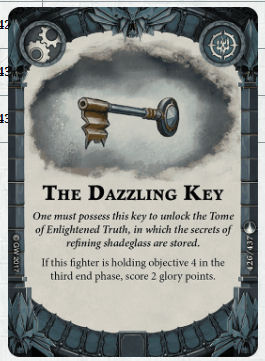
426 Dazzling Key
430 Shadowed Key
The cards can be split up into a few groups as follows:
Objective holding glory:
254 Determined Defenders
263 Hold Objective 1
264 Hold Objective 2
265 Hold Objective 3
266 Hold Objective 4
267 Hold Objective 5
281 Plant a Standard
292 Supremacy
296 Tactical Supremacy 1-2
297 Tactical Supremacy 3-4
426 Dazzling Key
430 Shadowed Key
–
–
Quite self explanatory. Hold objectives, get glory. Recognise the enhanced value of objectives 2 and 4 due to the keys.
Other Objectives:
89 Biggest an’ da Best
255 Divide and Conquer
–
Easy opportunity scorers that often naturally happen in the course of the game. Don’t chase them. If they aren’t happening ditch them.
Movement Shenanigans:
311 Confusion
318 Distraction
359 Shifting Shards
360 Sidestep
380 Cunning Duellist
416 Shardcaller
–
–
The way you get yourself onto those objectives to score! Shardcaller is the true star player here, bringing that high value objective 2 or 4 into the safety of your back line even if it originally ended up on the far side of the battlefield. Do everything you can to get it deployed turn one so you get your two uses out of it.
Power Card Diggers:
320 Duel of Wits
371 Trust to Luck
–
Helping you to dig up Shardcaller ASAP and those keys before game end.
Rock Solid Defence:
107 ‘Ard Head
115 Unkillable
330 Healing Potion
389 Great Fortitude
420 Soultrap
–
The high wounds and shield defence make Orruks a serious investment to remove. These cards bolster that even more causing your opponent to use more of their activations and resources and keeping you alive on those enemy territory objectives. Plus if you can take a hit, you get inspired and get to hit back harder.
Speed Boosts:
98 Brutal but Kunnin’
363 Sprint
390 Great Speed
402 Legendary Swiftness
–
When you need to make a dash into enemy territory to get to a far back objective, these cards help you get there quickly.
Too Good To Not Take:
315 Daylight Robbery
–
50% chance of a two point glory swing. ‘Nuff said.
Board Layout
I went for the board with the large piece of blocking terrain every time. In an ideal situation where you get to place three objectives they can be placed as below, with one nicely hidden behind the wall and all well back.

I also always placed the boards with the full length of the long edges touching. You may be tempted to go for the long thin setup to hide your objectives further back, but you will need to reach the enemy territory objectives yourself so the long distance hinders as much as it helps.
For deployment, Hakka and Basha sat at the far back ready to walk onto objectives, Gurzag went up front (though probably one row back from board edge) ready to dash into enemy territory. And Bonekutta either stood back ready to take the third home objective or stood with Gurzag ready to move forward depending on the situation.
General Tactics
Don’t be afraid to dump your initial hand of objectives if they aren’t looking achievable within the first turn.
Almost always dump your initial power cards if they don’t include Shardcaller, unless they include a key you already have the right objective for. I’ll occasionally go against this for a couple of the vital ‘Movement Shenanigans’ cards listed above if the objectives are already looking nice and achievable.
Discard objective cards in the end phase that you aren’t confident you can achieve next turn. Aggressively discard power cards to try and draw Shardcaller and the keys. I would often run out both decks by the third round.
Unless a strong enemy is stood next to you ready to attack (in which case go first to try and push them back and at least force them to use their charge), always pick to go second when you get the choice so as to get the last activation to take a contested objective.
Plan out how many moves are required to get your planned objectives for the turn and aggressively draw objectives/power cards with the ‘spare’ activations rather than taking pot shots at the enemy. You want to score at least two objective cards a turn.
Make your push forward into enemy territory to take an objective as late in the turn as possible so as to minimise your opponent’s opportunities to push back and knock you off target.
Only go for charge if it is part of a move onto an objective, or a possible kill late in the turn when you have your objectives already sewn up.
If an enemy charges one of your Orruks then you are hopefully now inspired and can bash back to push them away. If they charged and so can’t activate again, and you can two shot them, consider not pushing away and swinging again for the kill. Bonekutta is especially good at reactively punching back with his enhanced damage once inspired.
If there’s any way the enemy could interfere, then save your key upgrades to the last power phase of the game. Doing them earlier just locks you in to a single one of your fighter’s being the scorer and gives the enemy more time to thwart you. But if they are rock solid safe on the back line, putting them out before round 3 will let you draw more power cards.
That said, don’t forget to save enough unspent glory to put on the keys! That’s not a mistake you make twice…
Good luck!